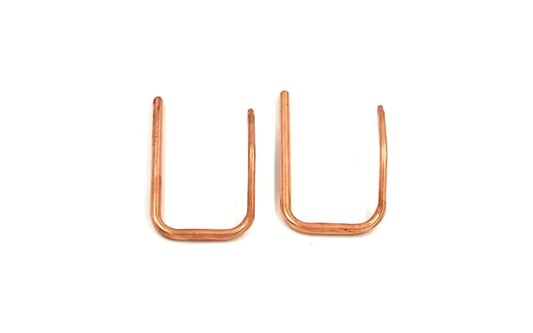
Categories

Are Heat Sinks Electrically Conductive? Explained!
Heat sinks are a crucial component in electronic devices as they help to dissipate heat generated from the operation of the devices, thus preventing overheating. They are made from various materials such as aluminum, copper, and graphite among others. But Are heat sinks electrically conductive?? Read on to find out!What Are Heat Sinks?A heat sink is a passive component designed to absorb and dissipate heat generated by electronic devices during operation. The heat sink transfers heat away from the electronic device to cool it down and prevent damage from overheating. It accomplishes this by increasing the surface area that is in contact with the surrounding air to facilitate heat transfer.The Materials Used in Making Heat SinksHeat sinks are typically made from metals such as copper and aluminum because they are good conductors of heat. Copper and aluminum, in particular, have high thermal conductivity, meaning they are very effective in transferring heat from the source. Additionally, some heat sinks are made from composites such as carbon fiber and graphite, which have lower thermal conductivity than metals, but are also good heat conductors.Are Heat Sinks Electrically Conductive?Yes, heat sinks are typically electrically conductive due to the materials they are made from. Copper and aluminum, which are the most common materials used in making heat sinks, are highly conductive to both heat and electricity. This means that if a heat sink comes in contact with an electrical component, it could potentially short out the circuit and cause damage to the device.The Importance of Insulating Heat SinksTo prevent heat sinks from causing accidental short circuits, they must be insulated from nearby electrical components. This is usually done by using insulating materials, such as mica, which act as a barrier between the heat sink and other components. Without proper insulation, a heat sink could cause a short circuit when it comes in contact with an electrical component, which could cause permanent damage to the device.The Impact of Heat Sink Design on ConductivityThe conductivity of a heat sink is influenced by its design. For instance, in some heat sinks, the metal fins may be coated with a layer of insulating material to prevent electrical conductance. Additionally, some heat sinks may have cooling fans that help to dissipate heat away from the device. This means that while heat sinks are generally electrically conductive, their conductivity can be mitigated by careful design and use of insulating materials.The Risks of Using Electrically Conductive Heat SinksWhile heat sinks are typically designed to ensure they do not cause accidental short circuits, there is always a risk of electrical conductance. If a heat sink comes into contact with an electrical component, it could cause a short circuit and damage the device. To minimize this risk, it is advisable to insulate the heat sink from other components, use non-conductive heat sink compounds, and ensure proper grounding of the device.The Benefits of Using Electrically Conductive Heat SinksDespite the risks associated with using electrically conductive heat sinks, there are also benefits to their use. The primary benefit is that they facilitate effective heat dissipation, which helps to prevent overheating and extend the lifespan of the device. Additionally, some heat sinks are designed to also serve as a physical barrier to protect the device from physical impact and external damage.The Role of Insulating Pads and Compounds in Preventing Short CircuitsTo prevent the accidental contact of heat sinks with electrical components, insulating pads and compounds are often used. These are materials placed between the heat sink and components to act as a barrier. The insulating pads and compounds are non-conductive, therefore preventing any electrical current from flowing between the heat sink and other components.ConclusionIn conclusion, heat sinks are crucial components in electronic devices responsible for dissipating heat and preventing overheating. While heat sinks are generally electrically conductive, there are several ways to mitigate the risks of short circuits, including careful design, proper grounding, and use of insulating pads and compounds.Quote InquiryContact us!
READ MORE
Can You Reuse Heat Sinks? Tips and Tricks for Beginners
The Importance of Heat SinksHeat sinks are essential components in any electronic device that requires cooling. They work by dissipating the heat generated by electrical components, preventing them from overheating and causing damage. In short, heat sinks ensure that your device runs efficiently and reliably. It's no wonder why these small parts are regarded as one of the most critical aspects of electronic design.What Are Heat Sinks Made Of?Heat sinks are typically made of aluminum due to its excellent thermal conductivity. Copper is also used for high-performance applications but is less common due to its higher cost. However, there are instances where other materials like ceramic, graphite, or even diamond are used, depending on the specific application and design requirements.Can you reuse heat sinks??One common question users ask is whether they can reuse heat sinks. The answer is: Yes, you can reuse them. However, it requires careful consideration and inspection before doing so. Heat sinks that have been in service for extended periods may have experienced thermal cycling or been exposed to wear and tear, leading to material fatigue or damage. If the heat sink appears to be in good condition, you can clean it and reuse it, assuming it's fit for the application's purpose.Cleaning Your Heat SinkCleaning your heat sink thoroughly before reuse is crucial to ensure optimal performance and longevity. Here's a step-by-step guide:Remove the heat sink from the device and clean the surface using a lint-free cloth and isopropyl alcohol. If there is a thermal interface material (TIM) on the heat sink, remove it carefully using a plastic pry tool. Inspect the heat sink for any signs of damage, cracks, or warping. If everything looks good, apply a new layer of TIM, reattach the heat sink to the device, and test it.When Not to Reuse Heat SinksThere are cases where reusing heat sinks may not be a good idea. For instance, if the heat sink has been exposed to extreme temperatures or chemicals or has visible damage, it's best to replace it with a new one. It's also worth noting that certain types of heat sinks, such as those with phase change materials or heat pipes, may not be suitable for reuse even if they appear to be in good condition.Benefits of Reusing Heat SinksReusing heat sinks can save time and money, especially for high-volume applications where cost is a major concern. It's also an eco-friendly practice that reduces waste and promotes sustainability. By reusing heat sinks, you can conserve resources and minimize your carbon footprint while achieving optimal performance from your device.How to Extend the Lifespan of Your Heat SinkProper maintenance and care are crucial in extending the lifespan of your heat sink. Here are some tips:Clean your heat sink regularly and inspect it for any signs of damage or wear and tear.Use high-quality TIMs to ensure optimal heat transfer efficiency.Avoid exposing your heat sink to extreme temperatures or chemicals that could damage it.Ensure proper installation and secure attachment to the device to prevent unnecessary stress or bending.If you're designing a new electronic device, consider using heat sinks with high-quality materials and advanced designs.ConclusionHeat sinks are vital components in electronic devices that require cooling. They can be reused if they're inspected and cleaned properly, but it's essential to exercise caution and replace them if they're in poor condition. By following the tips and best practices outlined above, you can maximize the lifespan and performance of your heat sink and ensure optimal cooling for your device.Quote InquiryContact us!
READ MORE
How to Maintain a Heat Sink: A Comprehensive Guide
IntroductionA heat sink is a vital component in electronic devices that dissipates heat from the device and keeps it within acceptable temperatures. If a heat sink is not maintained properly, it can lead to increased temperatures, reduced device performance and ultimately complete failure. In this article, we will guide you on How to maintain a heat sink? to ensure maximum efficiency and longevity.Clean the Heat Sink RegularlyThe accumulation of dust, debris and other contaminants can restrict airflow and reduce heat dissipation. Hence, it is important to clean the heat sink regularly. You can use compressed air or a soft-bristled brush to remove the dust from the fins. Be gentle and make sure not to bend any of the fins.Use Thermal Interface MaterialThermal interface material helps fill the microscopic gaps between the heat sink and the device, allowing heat to transfer more efficiently. It is important to use the correct type of material for your heat sink and device. Common types of thermal interface material include thermal paste, thermal pads, and thermal adhesives.Check for Proper MountingThe heat sink should be properly mounted onto the electronic device. Any loose or improper mounting can reduce thermal transfer efficiency or cause damage to the device. Make sure the mounting pressure is distributed evenly over the device and the heat sink.Monitor Your Device's TemperaturesKeep an eye on your device's temperatures regularly. High temperatures can lead to reduced performance and ultimately device failure. You can use software, such as SpeedFan or HWMonitor, to monitor the temperatures of your device's components.Avoid OverclockingOverclocking is the process of increasing your device's clock speed to achieve higher performance. While this may be beneficial for some applications, it can cause your device to generate more heat than it can handle, leading to increased temperatures and reduced lifespan. Avoid overclocking unless you know what you're doing.Avoid Blocking the Heat SinkThe heat sink requires adequate ventilation to dissipate heat effectively. Don't place your device in an enclosed space or cover the heat sink, as this can lead to increased temperatures and damage to the device.Replace the Thermal Interface MaterialOver time, the thermal interface material can degrade, leading to reduced thermal transfer efficiency. It is recommended to replace the thermal interface material every two years or if you notice increased temperatures.Replace Your Heat Sink if NecessaryIf you've tried all the above steps and your device is still running hot, it may be time to replace your heat sink. A damaged or worn-out heat sink can't dissipate heat effectively and can lead to device failure. Make sure to purchase a heat sink that is compatible with your device.Keep Your Device in a Cool EnvironmentThe ambient temperature can affect your device's performance and lifespan. Keep your device in a cool environment to help reduce temperatures. Avoid placing it in direct sunlight or near sources of heat such as radiators or heaters.Consult a Professional if in DoubtIf you're unsure about maintaining your heat sink, consult a professional. They can guide you on how to maintain your heat sink or replace it if necessary. Remember to always follow safety precautions when working with electronic devices.Quote InquiryContact us!
READ MORE
Should I Clean My Heat Sink? Tips on How to Keep Your Computer Running Smoothly
Has your computer been running slow lately? Have you been experiencing overheating or random shutdowns? These issues may be a sign that your computer's heat sink needs to be cleaned. In this article, we will provide you with tips on how to inspect and clean your heat sink. What is a Heat Sink?A heat sink is an essential part of your computer's cooling system. It is designed to dissipate heat generated by your computer's CPU (Central Processing Unit). If the heat sink becomes clogged with dust or debris, it will impede the flow of air and reduce cooling efficiency. Overheating can cause severe damage to your computer, including data loss and hardware failure Why Should I clean my heat sink??If your computer's heat sink is dirty, it will not be able to perform its job effectively. An accumulation of dust and debris on the heat sink will impede the flow of air and reduce cooling efficiency. This can cause your computer to overheat, leading to system instability, data loss, and other issues. Cleaning your heat sink is crucial to prevent costly hardware repairs and prolong the life of your computer.How To Inspect Your Heat SinkThe first step in determining whether your heat sink needs cleaning is to inspect it. To do this, you will need to open up your computer. Make sure you have unplugged the computer and discharged any static electricity by touching a metal object before you begin. Look for the heat sink, which will be a large metal block with fins. If you cannot locate the heat sink, consult your computer's user manual or research online for guidance. Once you have located the heat sink, visually inspect it for dust and debris. You can also check the temperature of your computer using diagnostic software. High temperatures are a sign that your heat sink may need to be cleaned.How To Clean Your Heat SinkCleaning your heat sink is a straightforward process, but it does require some caution and attention to detail. First, you will need to gather the necessary tools: compressed air duster, soft-bristled brush and a lint-free cloth. Next, use the compressed air duster to blow away dust and debris from the heat sink's fins. Make sure you hold the can upright and at a safe distance from your computer to avoid damaging your hardware or discharging moisture. Follow up by gently brushing away any stubborn dirt and wiping off any excess debris with a lint-free cloth. How Often Should I Clean My Heat Sink?The frequency with which you should clean your heat sink depends on various factors such as the environment you use your computer in, how often you use it and whether you have pets. As a general rule of thumb, it is recommended that you clean your heat sink every 6 to 12 months. For more frequent use, or if you have pets, you may need to clean it more often. Other Tips for Keeping Your Computer CoolIn addition to cleaning your heat sink regularly, there are other measures you can take to keep your computer running cool and efficient:Use your computer on a flat, hard surface to allow air to circulate freely.Avoid using your laptop on your lap or cushion which can restrict airflow.Do not block the air vents on your computerInvest in a cooling pad that helps to lower your computer's temperature.Ensure that your computer's fans are running correctly and replace them if they are not.ConclusionRegularly cleaning your heat sink is an essential maintenance task that every computer owner should know how to carry out. Over time, dust and debris buildup can reduce your computer's cooling efficiency, the root cause of several performance issues. By following the steps outlined in this article, you should be able to keep your heat sink clean and your computer running smoothly.Quote InquiryContact us!
READ MORE
Is it Okay to Use SSD without a Heatsink?
The Basics of SSD HeatsinksSolid-State Drives (SSDs) have become increasingly popular due to their faster data transfer speeds and improved efficiency for performance-heavy tasks. However, SSDs are prone to overheating, which can cause permanent damage to the drive over time. Heatsinks are used to dissipate heat from the SSD, preventing overheating. But Is it okay to use SSD without a heatsink?? Understanding SSD PerformanceSSD performance is directly related to temperature. Higher temperatures can result in lower performance and decreased lifespan of the drive. SSDs use a controller chip that processes data, and it generates heat while doing so. The greater the data transfer rate, the more heat is generated. Therefore, a heatsink is crucial for SSDs with high data transfer rates.Benefits of Using SSD HeatsinksSSD heatsinks offer several benefits, including:- Improved performance: A heatsink dissipates heat from the SSD, allowing it to run at higher levels without overheating. This ultimately improves its overall performance.- Extended lifespan: Overheating can cause damage to an SSD's components, which can lead to permanent data loss. A heatsink prevents overheating, thereby extending the lifespan of the drive.- Improved reliability: Using a heatsink reduces the risk of data loss and helps ensure the reliability of the drive.Factors to Consider When Using SSDs without HeatsinksAlthough SSD heatsinks are highly recommended, some situations may allow for the use of an SSD without a heatsink. Consider the following factors:- Low data transfer rates: If the SSD is not being used for performance-heavy tasks, it may not need a heatsink. - Adequate airflow: If the SSD is positioned in a location that has sufficient airflow, overheating may not be a concern.- Compatible enclosure: If the SSD is enclosed in a compatible case or mounting bracket, it may function optimally without a heatsink.SSD Brands That Require HeatsinksSome SSD brands are known to overheat and require heatsinks. These include:- Samsung 970 EVO Plus- Western Digital Black SN750- Kingston KC2000If you own any of these SSDs, it is essential to use a heatsink for optimal performance and lifespan.Types of SSD HeatsinksThere are two types of SSD heatsinks: passive and active. Passive heatsinks do not have fans and rely on natural airflow to dissipate heat. Active heatsinks have fans that actively cool the drive. Active heatsinks tend to be more effective than passive heatsinks, but they also tend to be louder and more expensive. Installing an SSD HeatsinkInstalling an SSD heatsink is relatively easy. It involves only a few simple steps:1. Remove the SSD from the motherboard.2. Apply thermal adhesive to the heatsink, making sure it covers the entire surface.3. Place the SSD on top of the applied adhesive.4. Secure the SSD onto the motherboard.ConclusionIn conclusion, using an SSD without a heatsink is possible, but it is highly recommended to use a heatsink for optimal performance, lifespan, and reliability. Consider the factors mentioned above when deciding whether or not to use an SSD without a heatsink.SSD, overheating, performance, lifespan, heatsinks, passive, active, compatibilityIs it Okay to Use SSD without a Heatsink? | Factors to ConsiderFind out if it is okay to use SSD without a heatsink. Learn about the benefits of using SSD heatsinks, factors to consider, types of heatsinks, and how to install them.Quote InquiryContact us!
READ MORE
Do Heat Sinks Go Bad? Understanding the Lifespan of Heat Sinks
Do heat sinks go bad?? Understanding the Lifespan of Heat SinksWhen it comes to keeping electronic devices cool, heat sinks play a crucial role in dissipating excess heat. However, over time, heat sinks may begin to fail, leading to increased temperatures and potential damage to the device. In this article, we will explore the question "Do heat sinks go bad?" and provide insights on how to prolong their lifespan.What are Heat Sinks?Before we address the question of whether heat sinks can go bad, let's first define what heat sinks are. Heat sinks are passive cooling systems that work by transferring heat away from a device to a larger surface area where it can dissipate. They are commonly used in electronic devices such as CPUs, GPUs, and power amplifiers, among others.How Do Heat Sinks Work?Heat sinks work by using a combination of thermal conduction and thermal radiation. They are made up of materials like aluminum or copper which are highly conductive and help to spread heat quickly across the surface of the heat sink. The larger surface area of the heat sink also helps to radiate the heat away from the device, preventing it from overheating.Can Heat Sinks Go Bad?While heat sinks are designed to last for the lifetime of an electronic device, they can go bad if they become damaged or are not maintained properly. Common issues that can cause heat sinks to fail include a buildup of dust and debris, incorrect installation, or damage from physical impacts.Effects of a Failed Heat SinkIf a heat sink fails, the device it is trying to cool will start to heat up at a faster rate. This can result in decreased performance, stability issues, and potentially permanent damage to the device. It is important to catch and address a failed heat sink as soon as possible to avoid these consequences.Signs of a Failing Heat SinkThere are several signs that can indicate a heat sink is failing. The most obvious sign is when a device begins to overheat and experience performance issues. However, other signs can include unusual noises from the device, visible damage to the heat sink, or excessive dust buildup on the surface of the heat sink.How to Prolong Heat Sink LifespanThere are several simple steps you can take to prolong the lifespan of your heat sink. The first is to ensure that it is installed correctly, with proper thermal paste and mounting pressure. Additionally, it is recommended to regularly clean the surface of the heat sink to remove any dust or debris buildup that could impact its performance. Finally, if you notice any signs of a failing heat sink, it is important to address the issue immediately to avoid further damage.When to Replace a Heat SinkIf a heat sink has become damaged or is no longer able to effectively cool the device it is intended for, it may be necessary to replace it. In some cases, a simple cleaning may be enough to restore the heat sink's functionality, but in more severe cases, a full replacement may be necessary.ConclusionHeat sinks play an important role in keeping electronic devices cool and preventing damage due to overheating. While they are designed to last for the lifetime of a device, there are several factors that can cause them to fail over time. By understanding the signs of a failing heat sink and taking steps to prolong their lifespan, you can help ensure that your electronic devices continue to run smoothly for years to come.Quote InquiryContact us!
READ MORE
How to Troubleshoot a Heatsink: A Comprehensive Guide
IntroductionHeatsinks play a pivotal role in keeping our computer hardware cool and running smoothly. Heatsinks that don't do their job can lead to overheating, hardware damage, and system crashes. Troubleshooting a heatsink can be tricky, but with the right knowledge and tools, you can identify and fix the problem quickly and efficiently.Check for Physical DamageSometimes, the issue with a heatsink can be as simple as physical damage. To troubleshoot this, you'll want to inspect the heatsink for any visible signs of physical damage such as dents, scratches, or disfiguration. If you notice any, try to determine what may have caused it and replace the heatsink as necessary.Clean the Heatsink and FanOver time, heatsinks can accumulate dust and debris that can impact their efficiency. To troubleshoot this, you'll want to carefully remove the heatsink and fan (if applicable) and clean them. Use compressed air or a soft-bristled brush to remove any dust, being careful not to damage any hardware.Check the Thermal PasteThermal paste is a material used to improve the heat transfer between the heatsink and the CPU. Over time, this paste can dry up or become less effective, leading to heat-related issues. Troubleshoot this by removing the heatsink and checking the condition of the thermal paste. If it's dry or cracked, you'll want to replace it.Monitor Temperatures and PerformanceSometimes, overheating issues with a heatsink can be more subtle. Troubleshoot this by regularly monitoring your computer temperatures and performance. If you notice that your computer is running hotter than normal or experiencing lower performance, this may be a sign of a failing heatsink.Inspect Fans and Power SupplyFans and the power supply are another potential cause of heatsink issues. Troubleshoot this by checking the condition of the fans and power supply. Ensure that the fans are running smoothly and not making any unusual noises, and that the power supply is functioning properly.Reapply Thermal PasteIf you suspect that the issue with your heatsink is related to thermal paste, you may want to try reapplying it to see if that helps. Carefully remove the old paste, clean the surfaces, and apply a high-quality thermal paste according to the manufacturer's instructions.Replace the HeatsinkIf none of the above troubleshooting methods work, you may want to consider replacing the heatsink altogether. This may be necessary if the heatsink is old, worn out, or beyond repair.Consider UpgradingIf you're still experiencing issues with your heatsink, you may want to consider upgrading to a more powerful and efficient model. This can help improve the performance and longevity of your computer hardware.ConclusionA failing or damaged heatsink can cause a range of issues that can impact the performance and lifespan of your computer hardware. By learning how to troubleshoot and fix these issues, you can ensure that your computer stays cool and running at peak performance.Quote InquiryContact us!
READ MORE
How Do I Know If My Heatsink Is Working? A Comprehensive Guide
What Is a Heatsink?A heatsink is a device that helps in dispersing the heat generated by electronic components into the environment, such as air or water. It consists of a series of fins made of copper or aluminum, which increases the device's surface area, allowing for more efficient heat dissipation. You may have a heatsink in your personal computer or laptop, among other electronic devices.Why is it Important to Ensure Your Heatsinks are Working Properly?If your heatsink isn't working correctly, your electronic devices may overheat, which can cause significant damage to your components, including your CPU or GPU. Additionally, overheating can cause a computer to slow down, freeze, and even shut down entirely, causing data loss. It's vital to ensure your heatsinks are working to keep your electronics performing and functioning well.How do I know if my heatsink is working??There are several ways to know if your heatsink is working or not:Touch Test: Because heatsinks disperse heat, they become hot when they work. By touching the heatsink, you can get an idea if they are working. If the heatsink is warm to the touch, it's a good sign that they are working correctly.Check CPU and GPU Temperature: You can check the CPU and GPU temperature using software like SpeedFan or HWMonitor. If temperatures are within the proper range during normal use under heavy loads, your heatsinks are likely working properly. Data on what is the optimal temperature range for your device can be found in the manufacturer's documentation.Listen for your Device's Fans: Heatsinks work in tandem with fans to disperse heat from components. If your device has fans, ensure they are running correctly and do not make loud grinding or whining noises, which could be an indication of improper functioning of the fans or heatsinks.Inspect Your Device: If you have physical access to your device, check to ensure that there is no dust accumulation around the heatsink. Dust or dirt can hamper the heatsink's performance by preventing airflow.When Should You Replace Your Heatsinks?If your heatsinks aren't working correctly, you might need to replace them entirely. However, note that it can be challenging to tell if a heatsink is broken based on its appearance alone. Therefore, it's best to establish some warning signs indicate when your heatsinks are broken. Here are some signs:High CPU/GPU Temperature: If the CPU and GPU temperatures are consistently higher than usual, even under minimal load, this could mean that the heatsinks aren't working properly.System Crashes: Systems crashes when under loads could be a result of the system overheating. If these crashes happen more frequently, even after standard maintenance, it may be time to replace heatsinks.Loud Fan Noises: If the fans in your system are making unusually loud noises that indicate that the fans are running at high RPMs, it could be a sign that the heatsinks aren't working correctly.Can You Replace the Heatsink on Your Own?If you have the proper knowledge and expertise, you can replace the heatsink on your own. However, it's always best to consult with a professional, especially if you aren't comfortable working with electronic devices or opening up your computer. A professional can help you identify the issue and resolve it for you.How Can You Avoid Heatsink Issues in the Future?The best approach to avoid heatsink issues is preventive maintenance. It would help if you regularly cleaned your device, particularly the internal components. This helps to eliminate dust and dirt accumulation, which clogs airflow and reduces heat dissipation. You can also install temperature monitoring software that can alert you when your device is approaching unsafe temperature levels. Proper upkeep includes checking fans regularly, making sure they're not blocked or obstructed, and scheduling routine maintenance checks with a professional.The Importance of Maintaining Your HeatsinksHeatsinks are essential components in electronic devices, and maintaining them properly is crucial to avoid any system damage. By implementing the tips mentioned above, you can ensure that your device's heatsinks function correctly, and your electronic devices perform as you expect them. If you notice any signs of heatsink failure, it's best to consult with a professional immediately to address the issue before it causes any significant damage to your systems.Quote InquiryContact us!
READ MORE
How to Reseat a Heatsink? - A Comprehensive Guide
How to reseat a heatsink?? - A Comprehensive GuideAs a computer owner or enthusiast, you might have encountered a situation where your computer was getting too hot and started to slow down or even overheat. One common culprit for this problem is an improperly seated heatsink. In this article, we will go over the steps needed to reseat a heatsink properly, ensuring that your computer runs smoothly and without overheating.What is a Heatsink, and Why is it Important?A heatsink is a vital component of a computer's cooling system. It is a metal object that sits on the CPU and dissipates the heat away from it. Without a properly working heatsink, the CPU would quickly overheat, which could lead to permanent damage to the CPU and other components of the computer.When to Reseat a Heatsink?If your computer is experiencing high temperatures, or if you hear the fan running loudly, it might be a sign that your heatsink needs to be reseated. You should also consider reseating the heatsink if you are upgrading your CPU or removing and reinstalling a CPU for some other reason.Step-by-Step Guide on Reseating a HeatsinkReseating a heatsink involves several steps and requires some basic knowledge of how to handle computer components. Here are the steps to follow:Step 1: Turn off the ComputerThe first step is to turn off your computer and unplug it from any power source to ensure your safety before you start handling its internal componentsStep 2: Remove the HeatsinkRemove the heatsink by gently turning it counterclockwise and lifting it off the CPU.Step 3: Clean the SurfaceBefore reseating the heatsink, you need to clean the surface thoroughly. You can use isopropyl alcohol and a lint-free cloth to clean the surface of the CPU. Make sure that there is no thermal paste left on the surface.Step 4: Apply Thermal PasteNext, apply a small amount of thermal paste on the surface of the CPU. You should use a pea-sized drop of thermal paste. Too much thermal paste could lead to overheating, so be careful not to apply too much.Step 5: Reseat the HeatsinkPlace the heatsink correctly on the surface of the CPU and gently push it into place, while applying slight pressure towards the CPU, this is the time to make sure the heatsink is level. Turn the heatsink clockwise until it is securely in place.Step 6: Tighten the ScrewsIf your heatsink uses screws to secure the installation, tighten the screws gently, in a diagonal pattern. You should not over-tighten the screws as that can cause damage to the CPU.Step 7: Reconnect the FanReconnect the fan connector to the motherboard. Make sure that the fan cable is connected securely to the motherboard and not pulling or stretching the cable or plug.Step 8: Power on the ComputerAfter reseating the heatsink and reconnecting the fan, turn on your computer and monitor the temperature levels. Ensure that the temperature is stable and not experiencing any erratic spikes. If the temperature is stable, then the reseating was successful.Step 9: Update Thermal Paste PeriodicallyThermal paste is essential for the health of your CPU. It is essential to replace your thermal paste every six months to a year to ensure that your CPU runs smoothly and without overheating.Step 10: Seek Professional HelpIf you are not confident in your ability to reseat a heatsink, do not hesitate to seek the help of a professional. Computer repair shops exist for precisely this reason, and they can ensure that your heatsink is reseated correctly and safely.ConclusionReseating a heatsink is a crucial step in maintaining your computer's health and ensuring that it runs smoothly and without overheating. While it might seem daunting at first, following the above steps can help even first-timers reseat the heatsink with ease. Remember, if you are unsure, do not hesitate to seek professional help.Quote InquiryContact us!
READ MORE