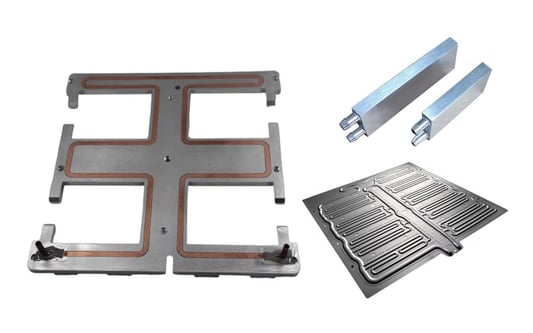
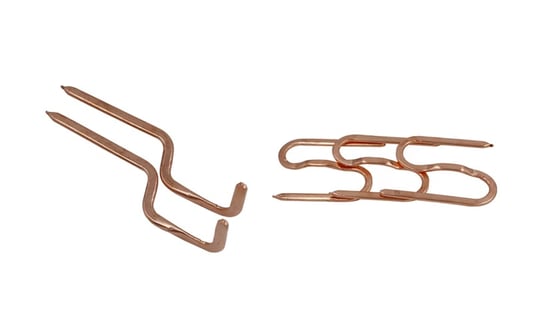
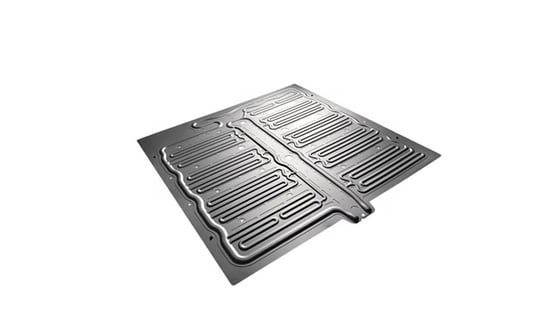
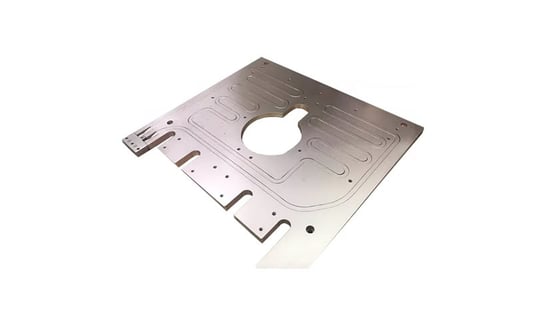
Categories

Should I Clean My Heat Sink? Tips on How to Keep Your Computer Running Smoothly
Has your computer been running slow lately? Have you been experiencing overheating or random shutdowns? These issues may be a sign that your computer's heat sink needs to be cleaned. In this article, we will provide you with tips on how to inspect and clean your heat sink. What is a Heat Sink?A heat sink is an essential part of your computer's cooling system. It is designed to dissipate heat generated by your computer's CPU (Central Processing Unit). If the heat sink becomes clogged with dust or debris, it will impede the flow of air and reduce cooling efficiency. Overheating can cause severe damage to your computer, including data loss and hardware failure Why Should I clean my heat sink??If your computer's heat sink is dirty, it will not be able to perform its job effectively. An accumulation of dust and debris on the heat sink will impede the flow of air and reduce cooling efficiency. This can cause your computer to overheat, leading to system instability, data loss, and other issues. Cleaning your heat sink is crucial to prevent costly hardware repairs and prolong the life of your computer.How To Inspect Your Heat SinkThe first step in determining whether your heat sink needs cleaning is to inspect it. To do this, you will need to open up your computer. Make sure you have unplugged the computer and discharged any static electricity by touching a metal object before you begin. Look for the heat sink, which will be a large metal block with fins. If you cannot locate the heat sink, consult your computer's user manual or research online for guidance. Once you have located the heat sink, visually inspect it for dust and debris. You can also check the temperature of your computer using diagnostic software. High temperatures are a sign that your heat sink may need to be cleaned.How To Clean Your Heat SinkCleaning your heat sink is a straightforward process, but it does require some caution and attention to detail. First, you will need to gather the necessary tools: compressed air duster, soft-bristled brush and a lint-free cloth. Next, use the compressed air duster to blow away dust and debris from the heat sink's fins. Make sure you hold the can upright and at a safe distance from your computer to avoid damaging your hardware or discharging moisture. Follow up by gently brushing away any stubborn dirt and wiping off any excess debris with a lint-free cloth. How Often Should I Clean My Heat Sink?The frequency with which you should clean your heat sink depends on various factors such as the environment you use your computer in, how often you use it and whether you have pets. As a general rule of thumb, it is recommended that you clean your heat sink every 6 to 12 months. For more frequent use, or if you have pets, you may need to clean it more often. Other Tips for Keeping Your Computer CoolIn addition to cleaning your heat sink regularly, there are other measures you can take to keep your computer running cool and efficient:Use your computer on a flat, hard surface to allow air to circulate freely.Avoid using your laptop on your lap or cushion which can restrict airflow.Do not block the air vents on your computerInvest in a cooling pad that helps to lower your computer's temperature.Ensure that your computer's fans are running correctly and replace them if they are not.ConclusionRegularly cleaning your heat sink is an essential maintenance task that every computer owner should know how to carry out. Over time, dust and debris buildup can reduce your computer's cooling efficiency, the root cause of several performance issues. By following the steps outlined in this article, you should be able to keep your heat sink clean and your computer running smoothly.Quote InquiryContact us!
READ MORE
Do Heat Sinks Go Bad? Understanding the Lifespan of Heat Sinks
Do heat sinks go bad?? Understanding the Lifespan of Heat SinksWhen it comes to keeping electronic devices cool, heat sinks play a crucial role in dissipating excess heat. However, over time, heat sinks may begin to fail, leading to increased temperatures and potential damage to the device. In this article, we will explore the question "Do heat sinks go bad?" and provide insights on how to prolong their lifespan.What are Heat Sinks?Before we address the question of whether heat sinks can go bad, let's first define what heat sinks are. Heat sinks are passive cooling systems that work by transferring heat away from a device to a larger surface area where it can dissipate. They are commonly used in electronic devices such as CPUs, GPUs, and power amplifiers, among others.How Do Heat Sinks Work?Heat sinks work by using a combination of thermal conduction and thermal radiation. They are made up of materials like aluminum or copper which are highly conductive and help to spread heat quickly across the surface of the heat sink. The larger surface area of the heat sink also helps to radiate the heat away from the device, preventing it from overheating.Can Heat Sinks Go Bad?While heat sinks are designed to last for the lifetime of an electronic device, they can go bad if they become damaged or are not maintained properly. Common issues that can cause heat sinks to fail include a buildup of dust and debris, incorrect installation, or damage from physical impacts.Effects of a Failed Heat SinkIf a heat sink fails, the device it is trying to cool will start to heat up at a faster rate. This can result in decreased performance, stability issues, and potentially permanent damage to the device. It is important to catch and address a failed heat sink as soon as possible to avoid these consequences.Signs of a Failing Heat SinkThere are several signs that can indicate a heat sink is failing. The most obvious sign is when a device begins to overheat and experience performance issues. However, other signs can include unusual noises from the device, visible damage to the heat sink, or excessive dust buildup on the surface of the heat sink.How to Prolong Heat Sink LifespanThere are several simple steps you can take to prolong the lifespan of your heat sink. The first is to ensure that it is installed correctly, with proper thermal paste and mounting pressure. Additionally, it is recommended to regularly clean the surface of the heat sink to remove any dust or debris buildup that could impact its performance. Finally, if you notice any signs of a failing heat sink, it is important to address the issue immediately to avoid further damage.When to Replace a Heat SinkIf a heat sink has become damaged or is no longer able to effectively cool the device it is intended for, it may be necessary to replace it. In some cases, a simple cleaning may be enough to restore the heat sink's functionality, but in more severe cases, a full replacement may be necessary.ConclusionHeat sinks play an important role in keeping electronic devices cool and preventing damage due to overheating. While they are designed to last for the lifetime of a device, there are several factors that can cause them to fail over time. By understanding the signs of a failing heat sink and taking steps to prolong their lifespan, you can help ensure that your electronic devices continue to run smoothly for years to come.Quote InquiryContact us!
READ MORE
How to Troubleshoot a Heatsink: A Comprehensive Guide
IntroductionHeatsinks play a pivotal role in keeping our computer hardware cool and running smoothly. Heatsinks that don't do their job can lead to overheating, hardware damage, and system crashes. Troubleshooting a heatsink can be tricky, but with the right knowledge and tools, you can identify and fix the problem quickly and efficiently.Check for Physical DamageSometimes, the issue with a heatsink can be as simple as physical damage. To troubleshoot this, you'll want to inspect the heatsink for any visible signs of physical damage such as dents, scratches, or disfiguration. If you notice any, try to determine what may have caused it and replace the heatsink as necessary.Clean the Heatsink and FanOver time, heatsinks can accumulate dust and debris that can impact their efficiency. To troubleshoot this, you'll want to carefully remove the heatsink and fan (if applicable) and clean them. Use compressed air or a soft-bristled brush to remove any dust, being careful not to damage any hardware.Check the Thermal PasteThermal paste is a material used to improve the heat transfer between the heatsink and the CPU. Over time, this paste can dry up or become less effective, leading to heat-related issues. Troubleshoot this by removing the heatsink and checking the condition of the thermal paste. If it's dry or cracked, you'll want to replace it.Monitor Temperatures and PerformanceSometimes, overheating issues with a heatsink can be more subtle. Troubleshoot this by regularly monitoring your computer temperatures and performance. If you notice that your computer is running hotter than normal or experiencing lower performance, this may be a sign of a failing heatsink.Inspect Fans and Power SupplyFans and the power supply are another potential cause of heatsink issues. Troubleshoot this by checking the condition of the fans and power supply. Ensure that the fans are running smoothly and not making any unusual noises, and that the power supply is functioning properly.Reapply Thermal PasteIf you suspect that the issue with your heatsink is related to thermal paste, you may want to try reapplying it to see if that helps. Carefully remove the old paste, clean the surfaces, and apply a high-quality thermal paste according to the manufacturer's instructions.Replace the HeatsinkIf none of the above troubleshooting methods work, you may want to consider replacing the heatsink altogether. This may be necessary if the heatsink is old, worn out, or beyond repair.Consider UpgradingIf you're still experiencing issues with your heatsink, you may want to consider upgrading to a more powerful and efficient model. This can help improve the performance and longevity of your computer hardware.ConclusionA failing or damaged heatsink can cause a range of issues that can impact the performance and lifespan of your computer hardware. By learning how to troubleshoot and fix these issues, you can ensure that your computer stays cool and running at peak performance.Quote InquiryContact us!
READ MORE
How Do I Know If My Heatsink Is Working? A Comprehensive Guide
What Is a Heatsink?A heatsink is a device that helps in dispersing the heat generated by electronic components into the environment, such as air or water. It consists of a series of fins made of copper or aluminum, which increases the device's surface area, allowing for more efficient heat dissipation. You may have a heatsink in your personal computer or laptop, among other electronic devices.Why is it Important to Ensure Your Heatsinks are Working Properly?If your heatsink isn't working correctly, your electronic devices may overheat, which can cause significant damage to your components, including your CPU or GPU. Additionally, overheating can cause a computer to slow down, freeze, and even shut down entirely, causing data loss. It's vital to ensure your heatsinks are working to keep your electronics performing and functioning well.How do I know if my heatsink is working??There are several ways to know if your heatsink is working or not:Touch Test: Because heatsinks disperse heat, they become hot when they work. By touching the heatsink, you can get an idea if they are working. If the heatsink is warm to the touch, it's a good sign that they are working correctly.Check CPU and GPU Temperature: You can check the CPU and GPU temperature using software like SpeedFan or HWMonitor. If temperatures are within the proper range during normal use under heavy loads, your heatsinks are likely working properly. Data on what is the optimal temperature range for your device can be found in the manufacturer's documentation.Listen for your Device's Fans: Heatsinks work in tandem with fans to disperse heat from components. If your device has fans, ensure they are running correctly and do not make loud grinding or whining noises, which could be an indication of improper functioning of the fans or heatsinks.Inspect Your Device: If you have physical access to your device, check to ensure that there is no dust accumulation around the heatsink. Dust or dirt can hamper the heatsink's performance by preventing airflow.When Should You Replace Your Heatsinks?If your heatsinks aren't working correctly, you might need to replace them entirely. However, note that it can be challenging to tell if a heatsink is broken based on its appearance alone. Therefore, it's best to establish some warning signs indicate when your heatsinks are broken. Here are some signs:High CPU/GPU Temperature: If the CPU and GPU temperatures are consistently higher than usual, even under minimal load, this could mean that the heatsinks aren't working properly.System Crashes: Systems crashes when under loads could be a result of the system overheating. If these crashes happen more frequently, even after standard maintenance, it may be time to replace heatsinks.Loud Fan Noises: If the fans in your system are making unusually loud noises that indicate that the fans are running at high RPMs, it could be a sign that the heatsinks aren't working correctly.Can You Replace the Heatsink on Your Own?If you have the proper knowledge and expertise, you can replace the heatsink on your own. However, it's always best to consult with a professional, especially if you aren't comfortable working with electronic devices or opening up your computer. A professional can help you identify the issue and resolve it for you.How Can You Avoid Heatsink Issues in the Future?The best approach to avoid heatsink issues is preventive maintenance. It would help if you regularly cleaned your device, particularly the internal components. This helps to eliminate dust and dirt accumulation, which clogs airflow and reduces heat dissipation. You can also install temperature monitoring software that can alert you when your device is approaching unsafe temperature levels. Proper upkeep includes checking fans regularly, making sure they're not blocked or obstructed, and scheduling routine maintenance checks with a professional.The Importance of Maintaining Your HeatsinksHeatsinks are essential components in electronic devices, and maintaining them properly is crucial to avoid any system damage. By implementing the tips mentioned above, you can ensure that your device's heatsinks function correctly, and your electronic devices perform as you expect them. If you notice any signs of heatsink failure, it's best to consult with a professional immediately to address the issue before it causes any significant damage to your systems.Quote InquiryContact us!
READ MORE
How to Reseat a Heatsink? - A Comprehensive Guide
How to reseat a heatsink?? - A Comprehensive GuideAs a computer owner or enthusiast, you might have encountered a situation where your computer was getting too hot and started to slow down or even overheat. One common culprit for this problem is an improperly seated heatsink. In this article, we will go over the steps needed to reseat a heatsink properly, ensuring that your computer runs smoothly and without overheating.What is a Heatsink, and Why is it Important?A heatsink is a vital component of a computer's cooling system. It is a metal object that sits on the CPU and dissipates the heat away from it. Without a properly working heatsink, the CPU would quickly overheat, which could lead to permanent damage to the CPU and other components of the computer.When to Reseat a Heatsink?If your computer is experiencing high temperatures, or if you hear the fan running loudly, it might be a sign that your heatsink needs to be reseated. You should also consider reseating the heatsink if you are upgrading your CPU or removing and reinstalling a CPU for some other reason.Step-by-Step Guide on Reseating a HeatsinkReseating a heatsink involves several steps and requires some basic knowledge of how to handle computer components. Here are the steps to follow:Step 1: Turn off the ComputerThe first step is to turn off your computer and unplug it from any power source to ensure your safety before you start handling its internal componentsStep 2: Remove the HeatsinkRemove the heatsink by gently turning it counterclockwise and lifting it off the CPU.Step 3: Clean the SurfaceBefore reseating the heatsink, you need to clean the surface thoroughly. You can use isopropyl alcohol and a lint-free cloth to clean the surface of the CPU. Make sure that there is no thermal paste left on the surface.Step 4: Apply Thermal PasteNext, apply a small amount of thermal paste on the surface of the CPU. You should use a pea-sized drop of thermal paste. Too much thermal paste could lead to overheating, so be careful not to apply too much.Step 5: Reseat the HeatsinkPlace the heatsink correctly on the surface of the CPU and gently push it into place, while applying slight pressure towards the CPU, this is the time to make sure the heatsink is level. Turn the heatsink clockwise until it is securely in place.Step 6: Tighten the ScrewsIf your heatsink uses screws to secure the installation, tighten the screws gently, in a diagonal pattern. You should not over-tighten the screws as that can cause damage to the CPU.Step 7: Reconnect the FanReconnect the fan connector to the motherboard. Make sure that the fan cable is connected securely to the motherboard and not pulling or stretching the cable or plug.Step 8: Power on the ComputerAfter reseating the heatsink and reconnecting the fan, turn on your computer and monitor the temperature levels. Ensure that the temperature is stable and not experiencing any erratic spikes. If the temperature is stable, then the reseating was successful.Step 9: Update Thermal Paste PeriodicallyThermal paste is essential for the health of your CPU. It is essential to replace your thermal paste every six months to a year to ensure that your CPU runs smoothly and without overheating.Step 10: Seek Professional HelpIf you are not confident in your ability to reseat a heatsink, do not hesitate to seek the help of a professional. Computer repair shops exist for precisely this reason, and they can ensure that your heatsink is reseated correctly and safely.ConclusionReseating a heatsink is a crucial step in maintaining your computer's health and ensuring that it runs smoothly and without overheating. While it might seem daunting at first, following the above steps can help even first-timers reseat the heatsink with ease. Remember, if you are unsure, do not hesitate to seek professional help.Quote InquiryContact us!
READ MORE
How to Attach a Heat Sink to a Processor?
Understanding the Importance of a Heat Sink for a ProcessorA heat sink is an essential component of a computer that helps to dissipate the heat produced by a processor. The heat sink absorbs the heat from the processor and transfers it to the air around it. This ensures that the temperature inside the computer remains within safe limits. Without a heat sink, the processor can overheat and get damaged. Step-by-Step Guide to Install a Heat Sink on a ProcessorHere is a step-by-step guide to help you attach a heat sink to a processor:Start by cleaning the surface of the processor with isopropyl alcohol to remove any thermal paste or debris.Apply a small amount of thermal paste on the center of the processor. A pea-sized amount is enough.Attach the brackets that came with the heat sink onto the screw holes located around the processor. Place the heat sink on top of the processor and align it with the brackets. Press down on each arm of the brackets to lock the heat sink in place. Connect the fan to the power supply or motherboard to ensure proper cooling. Types of Heat Sinks Available for ProcessorsThere are mainly three types of heat sinks available for processors:Air-cooled heat sinkWater-cooled heat sinkPassive heat sinkSelecting the Right Heat Sink for Your ProcessorWhen selecting a heat sink, consider the following factors:The power of the processor.The size and shape of the heat sink.The noise level of the fan attached to the heat sink.Your budget for the heat sink.Precautions to Take When Attaching a Heat Sink to a ProcessorHere are some precautions that you should take when attaching a heat sink to a processor:Avoid touching the bottom of the heat sink or the thermal paste with your fingers.Ensure that the heat sink is aligned correctly with the processor to prevent any damage to the processor or the heat sink.Ensure that the fan blades of the heat sink are dust-free and spinning properly to ensure appropriate cooling performance.Replacing a Faulty Heat SinkIf your heat sink is faulty or not cooling your processor sufficiently, you may need to replace it. When replacing a faulty heat sink, follow the same steps for attaching a new heat sink.Advantages of Using a Heat Sink for a ProcessorSome advantages of using a heat sink for a processor include:Preventing damage to the processor due to overheating.Increasing the lifespan of the processor. Ensuring stable performance of the processor.Reducing noise from the cooling fan due to more efficient cooling.Common Mistakes to Avoid When Attaching a Heat Sink to a ProcessorSome common mistakes to avoid when attaching a heat sink to a processor include:Applying too much or too little thermal paste on the processor.Attaching the heat sink without properly cleaning the surface of the processor.Not aligning the heat sink with the brackets properly before locking it in place.Forgetting to connect the fan to the power supply or motherboard after attaching the heat sink.ConclusionAttaching a heat sink to a processor is an important task for ensuring the smooth operation of a computer. A heat sink helps to prevent damage to the processor and increases its lifespan. By following the steps outlined in this article and taking the necessary precautions, you can attach a heat sink to a processor in a safe and efficient manner.Quote InquiryContact us!
READ MORE
What Is Required for Heat Sink? Important Aspects to Know
IntroductionHeat sinks are an essential part of any electronic device to prevent overheating and potential damage. They are commonly used in laptops, smartphones, and computers to regulate heat emitted by the components. If you are planning to use a heat sink, it is crucial to understand What is required for heat sink? and how it works. The Purpose of Heat SinkThe primary function of a heat sink is to absorb, transfer, and dissipate heat generated by electronic components such as CPU, GPU, or power transistors. The two primary methods of heat transfer in a heat sink are conduction and radiation. A heat sink provides a larger surface area for air or liquid coolant to pass through and take away the heat generated by the components. Hence, a properly functioning heat sink will help maintain the optimal performance of the device and prevent damage caused due to overheating. Materials Used for Heat SinkThe materials used for heat sink are critical to their performance. Typically, a heat sink is made of materials that have high thermal conductivity, corrosion resistance, and good mechanical properties. Common materials used include aluminum, copper, and their alloys. Copper is a more efficient heat conductor than aluminum, but it is more expensive. Aluminum is a popular choice as it is affordable, lightweight, and has excellent corrosion resistance. However, the choice of material may vary depending upon the application, the required performance, and the cost. Design Considerations for Heat SinkThe design of the heat sink plays an essential role in its performance. The design of the heat sink should ensure maximum contact area between the heat-generating device and the heat sink to achieve minimum thermal resistance. The design should also provide a path for the dissipation of heat, such as fins or other surface enhancements. The shape and size of the heat sink are determined based on factors such as the heat generated, ambient temperature, and available space. A well-designed heat sink would also take into consideration the airflow through the device. Installation of Heat SinkThe installation of the heat sink has a significant impact on its performance. It is essential to consider the orientation of the heat sink and the thermal paste or compound used between the heat sink and the electronic component. The thermal paste or compound improves the contact area between the two surfaces and helps in the transfer of heat. The thickness, consistency, and application of thermal paste must be optimal to ensure maximum performance. The mounting pressure while installing the heat sink should also be uniform for proper contact between the two surfaces. Factors Affecting Heat Sink PerformanceThe performance of a heat sink can be affected by several factors, such as the ambient temperature, airflow, thermal resistance of the material used, and the surface finish of the heat sink. High temperatures can increase the thermal resistance of the material and decrease the efficiency of the heat sink. Inadequate airflow or obstruction can reduce the rate of heat dissipation. A rough surface finish can decrease the contact area and hence the efficiency of the heat sink. Types of Heat SinksThere are several types of heat sinks available in the market, each with its unique design and performance. Some common types include passive heat sinks, active heat sinks, liquid-cooled heat sinks, and heat pipes. Passive heat sinks are simple designs that rely on natural convection to dissipate heat. Active heat sinks include fans or blowers to create airflow and increase cooling performance. Liquid-cooled heat sinks use a liquid coolant to carry away heat. Heat pipes are tubular structures that use the principle of phase change to transfer heat. The choice of heat sink type depends on the application, cooling requirements, and other factors. Maintenance of Heat SinkMaintenance of heat sink is essential to ensure its longevity and optimal performance. The surface of the heat sink should be cleaned periodically to remove any dust, debris, or other contaminants that can obstruct airflow. The thermal paste or compound should be replaced periodically to maintain optimal contact between the electronic component and the heat sink. The mounting pressure should also be checked and adjusted if necessary, to ensure uniform contact pressure. Compatibility with Electronic ComponentsThe compatibility of the heat sink with the electronic component is crucial for optimal performance. The heat sink should be designed to fit the shape, size, and orientation of the component for maximum contact area. It is also essential to consider the thermal requirements and limitations of the components and choose a heat sink that can meet those requirements. Improper compatibility can lead to reduced performance or even damage to the components. Cost of Heat SinkThe cost of a heat sink can vary depending upon several factors such as the material used, design, and type. Copper heat sinks are more expensive than aluminum heat sinks. A well-designed and efficient heat sink may also cost more. However, the cost of the heat sink should be evaluated against its performance and its suitability for the application. ConclusionHeat sinks are crucial components of any electronic device to prevent overheating and potential damage. It is essential to consider several factors such as material, design, installation, maintenance, and compatibility to ensure optimal performance. Choosing the right heat sink can improve the lifespan and efficiency of the electronic device while ensuring reliable performance. Quote InquiryContact us!
READ MORE
How Can I Make My Heat Sink More Efficient?
IntroductionHeat sinks are an integral part of electronic devices, which help to dissipate heat generated by the components. A heat sink that is more efficient will enable the component to perform better, and last longer. In this article, we will discuss some ways in which you can make your heat sink more efficient.1. Choose the right materialThe material of the heat sink is an important factor to consider when it comes to efficiency. Aluminum is a popular choice due to its high thermal conductivity, but materials such as copper and graphite can provide better results. Copper has a higher thermal conductivity than aluminum, while graphite can provide even better results due to its ability to spread heat in multiple directions.2. Optimize the size and shapeThe size and shape of the heat sink can also greatly affect its efficiency. In general, a larger heat sink will have more surface area for heat dissipation, while a shape that is optimized for airflow can improve performance even further.3. Improve contact with the componentGood thermal contact between the heat sink and the component is crucial for efficient heat dissipation. Use thermal paste or pads to fill in any gaps between the surfaces, and ensure that the heat sink is securely attached to the component.4. Increase air flowGood airflow around the heat sink can improve its efficiency by allowing heat to dissipate faster. Fans or vents can be used to increase airflow, and it may also be beneficial to position the heat sink in an area with good natural airflow.5. Consider liquid coolingLiquid cooling systems can offer superior heat dissipation capabilities compared to traditional air-cooled heat sinks. They work by circulating liquid through channels in the heat sink, providing more efficient cooling.6. Add fins or pinsFins or pins can be added to the heat sink to increase its surface area, which in turn can improve its efficiency. These can be particularly effective when combined with a shape that is optimized for airflow.7. Use a heat pipeA heat pipe is a device that uses a closed loop to transfer heat away from the component. By using a heat pipe in conjunction with a heat sink, efficiency can be greatly increased due to the faster heat transfer.8. Consider the ambient temperatureThe ambient temperature of the surrounding environment can greatly affect the efficiency of a heat sink. Higher ambient temperatures will make it harder for the heat sink to dissipate heat, so it may be necessary to consider alternative cooling solutions.9. Minimize thermal resistanceThermal resistance refers to anything that inhibits the flow of heat through the heat sink. This could include poorly applied thermal paste, or an incorrect attachment system. By identifying and minimizing these sources of resistance, efficiency can be greatly increased.10. Optimize the component itselfFinally, it is important to consider the component itself when looking to improve heat sink efficiency. This could include adjusting component placement, or optimizing energy consumption to reduce the overall heat generated.Quote InquiryContact us!
READ MORE
What Should You Apply Directly on the Processor Before Installing the Heat Sink?
IntroductionWhen building or upgrading your computer, applying thermal paste directly on the processor before installing the heat sink is crucial. Thermal paste fills in microscopic gaps between the processor and heat sink, allowing for better heat transfer and preventing overheating. But What should you apply directly on the processor before installing the heat sink?? In this article, we'll explore the different types of thermal paste and the proper way to apply it.Types of Thermal PasteThere are three main types of thermal paste: ceramic, metal, and silicone. Ceramic paste is non-conductive and ideal for use on sensitive electronics, while metal paste contains small metal particles that help with heat transfer. Silicone paste is a popular choice among computer enthusiasts, as it provides a good balance of performance and ease of use.How Much Thermal Paste to UseWhen applying thermal paste, less is more. Applying too much thermal paste can actually hinder heat transfer, resulting in higher temperatures. A pea-sized amount of thermal paste is all you need. Place it in the middle of the processor, and let the weight of the heat sink spread it evenly.Cleaning the Processor and Heat SinkBefore applying thermal paste, make sure the processor and heat sink are clean. Any dust or debris can hinder heat transfer. Use isopropyl alcohol and a lint-free cloth to clean both surfaces thoroughly.Applying Thermal PasteTo apply thermal paste, follow these simple steps:1. Clean the processor and heat sink.2. Apply a pea-sized amount of thermal paste in the center of the processor.3. Let the weight of the heat sink spread the thermal paste evenly.4. Secure the heat sink in place according to the manufacturer's instructions.Replacing the Heat SinkIf you're replacing the heat sink, be sure to remove any residual thermal paste from the processor and heat sink. Use isopropyl alcohol and a lint-free cloth to clean both surfaces thoroughly before applying new thermal paste and attaching the new heat sink.Choosing the Right Heat SinkIn addition to thermal paste, it's important to choose the right heat sink for your processor. Different processors have different cooling requirements. Be sure to do your research and choose a heat sink that's compatible with your processor.Testing TemperatureAfter applying thermal paste and installing the heat sink, it's a good idea to test the temperature of your processor using a temperature monitoring software. If your processor is running too hot, you may need to reapply thermal paste or invest in a better heat sink.ConclusionApplying thermal paste directly on the processor before installing the heat sink is an essential step in building or upgrading your computer. By choosing the right type of thermal paste, applying it correctly, and choosing the right heat sink, you can ensure your processor stays cool and avoids overheating.thermal paste, processor, heat sink, ceramic paste, metal paste, silicone pasteWhat to Apply on the Processor Before Installing the Heat Sink?Learn what type of thermal paste to apply directly on the processor before installing the heat sink, how much to apply, and other essential tips to keep your processor cool.Quote InquiryContact us!
READ MORE