
The Importance of Heat Sinks in Electronics and How to Use Them
Heat sinks play a crucial role in managing heat generated by electronic devices. Whether you're a DIY enthusiast or a professional, understanding how to use a heat sink effectively can help prevent overheating issues and extend the lifespan of your electronics. In this article, we will provide a comprehensive guide on how to use heat sinks, covering important aspects such as choosing the right heat sink, proper installation techniques, and common mistakes to avoid.
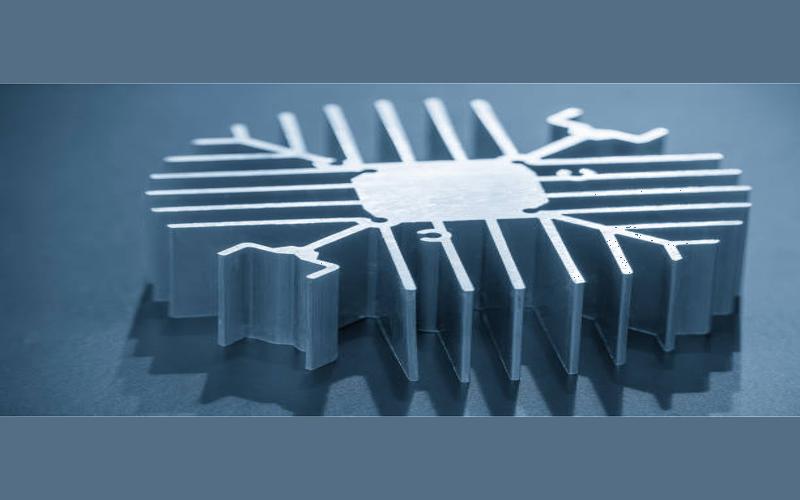
1. What is a Heat Sink and Why is it Important?
A heat sink is a passive cooling device that transfers heat from a hot component to the surrounding environment. It consists of a metal base and fins that increase the surface area for better heat dissipation. The primary purpose of a heat sink is to prevent electronic components from reaching excessive temperatures, which can lead to performance degradation or even permanent damage.
Heat sinks are crucial in various electronics, including computer processors, graphics cards, power amplifiers, and LED lights. By efficiently dissipating heat, they help maintain optimal operating temperatures, ensuring reliable performance and prolonging the lifespan of these devices.
2. Types of Heat Sinks
Before diving into the process of using a heat sink, it's important to understand the different types available. The choice of heat sink depends on factors such as the component's power dissipation, available space, and airflow conditions. Here are some common types:
a) Active Heat Sinks
Active heat sinks incorporate a fan or blower to enhance the airflow and improve heat dissipation. These heat sinks are suitable for components with high power dissipation that require additional cooling beyond what passive heat sinks can provide.
b) Passive Heat Sinks
Passive heat sinks rely solely on natural convection to dissipate heat. They don't have any moving parts and are typically made of aluminum or copper. Passive heat sinks are ideal for components with moderate power dissipation and where noise reduction is a priority.
3. Selecting the Right Heat Sink
Choosing the right heat sink for your application is crucial for effective heat dissipation. Here are some factors to consider:
a) Thermal Resistance
Thermal resistance is a measure of how well a heat sink can dissipate heat. It is usually specified in degrees Celsius per Watt (°C/W). Lower thermal resistance indicates better heat dissipation capability.
b) Size and Weight
The size and weight of the heat sink should match the available space and mounting requirements of your electronic component. Ensure the heat sink doesn't obstruct other components or impede airflow.
c) Material
Heat sinks are commonly made of aluminum or copper. Aluminum is lightweight and cost-effective, while copper offers better thermal conductivity. Consider the specific requirements of your application when choosing the material.
d) Fin Design
The design of the fins on a heat sink greatly affects its cooling performance. Fins with a larger surface area and spacing allow for better heat dissipation. Consider the available airflow conditions when selecting the fin design.
4. Proper Heat Sink Installation
Installing a heat sink correctly is crucial for its effectiveness. Follow these steps for a successful installation:
a) Clean the Surface
Before attaching the heat sink, ensure the surface of the component is clean and free from any debris or thermal interface material (TIM). Use isopropyl alcohol to clean the surface and remove any existing thermal compound.
b) Apply Thermal Interface Material
Apply a thin layer of thermal interface material on the component's surface. This material helps improve thermal conductivity between the component and the heat sink.
c) Attach the Heat Sink
Align the heat sink with the component's surface and gently press it into place. Ensure proper contact between the thermal interface material and the heat sink's base.
d) Secure the Heat Sink
Use appropriate mounting hardware, such as screws or clips, to secure the heat sink in place. Follow the manufacturer's guidelines for the correct mounting method.
e) Verify Proper Contact
After installation, ensure there is proper contact between the heat sink and the component's surface. Insufficient contact can hinder heat transfer and reduce the effectiveness of the heat sink.
5. Common Mistakes to Avoid
When using a heat sink, it's important to avoid common mistakes that can compromise its effectiveness. Here are some mistakes to steer clear of:
a) Insufficient Airflow
Ensure there is adequate airflow around the heat sink to facilitate heat dissipation. Avoid placing obstructions that restrict the natural convection process.
b) Over-tightening
Avoid over-tightening the mounting hardware as it can deform the heat sink and hinder proper contact with the component's surface. Follow the manufacturer's recommended torque specifications.
c) Improper Thermal Interface Material Application
Applying too much or too little thermal interface material can negatively impact heat transfer. Follow the manufacturer's guidelines for the recommended quantity and application method.
6. Testing and Monitoring Heat Sink Performance
After installing a heat sink, it's essential to test and monitor its performance to ensure effective heat dissipation. Here are some methods you can use:
a) Temperature Monitoring
Use temperature monitoring software or thermal sensors to measure the component's temperature before and after installing the heat sink. A noticeable temperature reduction indicates the heat sink is functioning properly.
b) Stress Testing
Subject the electronic component to stress tests to simulate real-world operating conditions. Monitor the temperature during these tests to ensure it remains within acceptable limits.
7. Extending Heat Sink Lifespan
Proper maintenance can help extend the lifespan of your heat sink. Here are some tips:
a) Regular Cleaning
Periodically clean the heat sink to remove dust and debris that can accumulate on the fins. Use compressed air or a soft brush to gently clean the surface.
b) Thermal Interface Material Replacement
Over time, the thermal interface material may degrade or dry out. Replace it periodically to maintain optimal heat transfer between the heat sink and the component.
8. FAQs
Q: Can I reuse a heat sink?
A: Yes, heat sinks can be reused if they are still in good condition and the thermal interface material is replaced.
Q: Do all components require a heat sink?
A: No, not all components require a heat sink. Components with low power dissipation may not generate enough heat to require additional cooling.
9. Conclusion
Heat sinks are essential for managing heat in electronic devices. By selecting the right heat sink, following proper installation techniques, and avoiding common mistakes, you can ensure optimal performance and longevity for your electronics. Remember to regularly monitor and maintain your heat sink to maximize its effectiveness. Now that you have a comprehensive understanding of how to use a heat sink, you can confidently tackle any cooling challenges that come your way.
10. Related Articles
1. How to Choose the Right Thermal Interface Material
2. The Role of Fans in Heat Dissipation
3. Overclocking Guide: Maximizing Performance While Managing Heat